Tutorials · 9 min read
How to Paint a Watercolor Birthday Card: Easy Step-by-Step Tutorial
By Céline · August 5, 2026
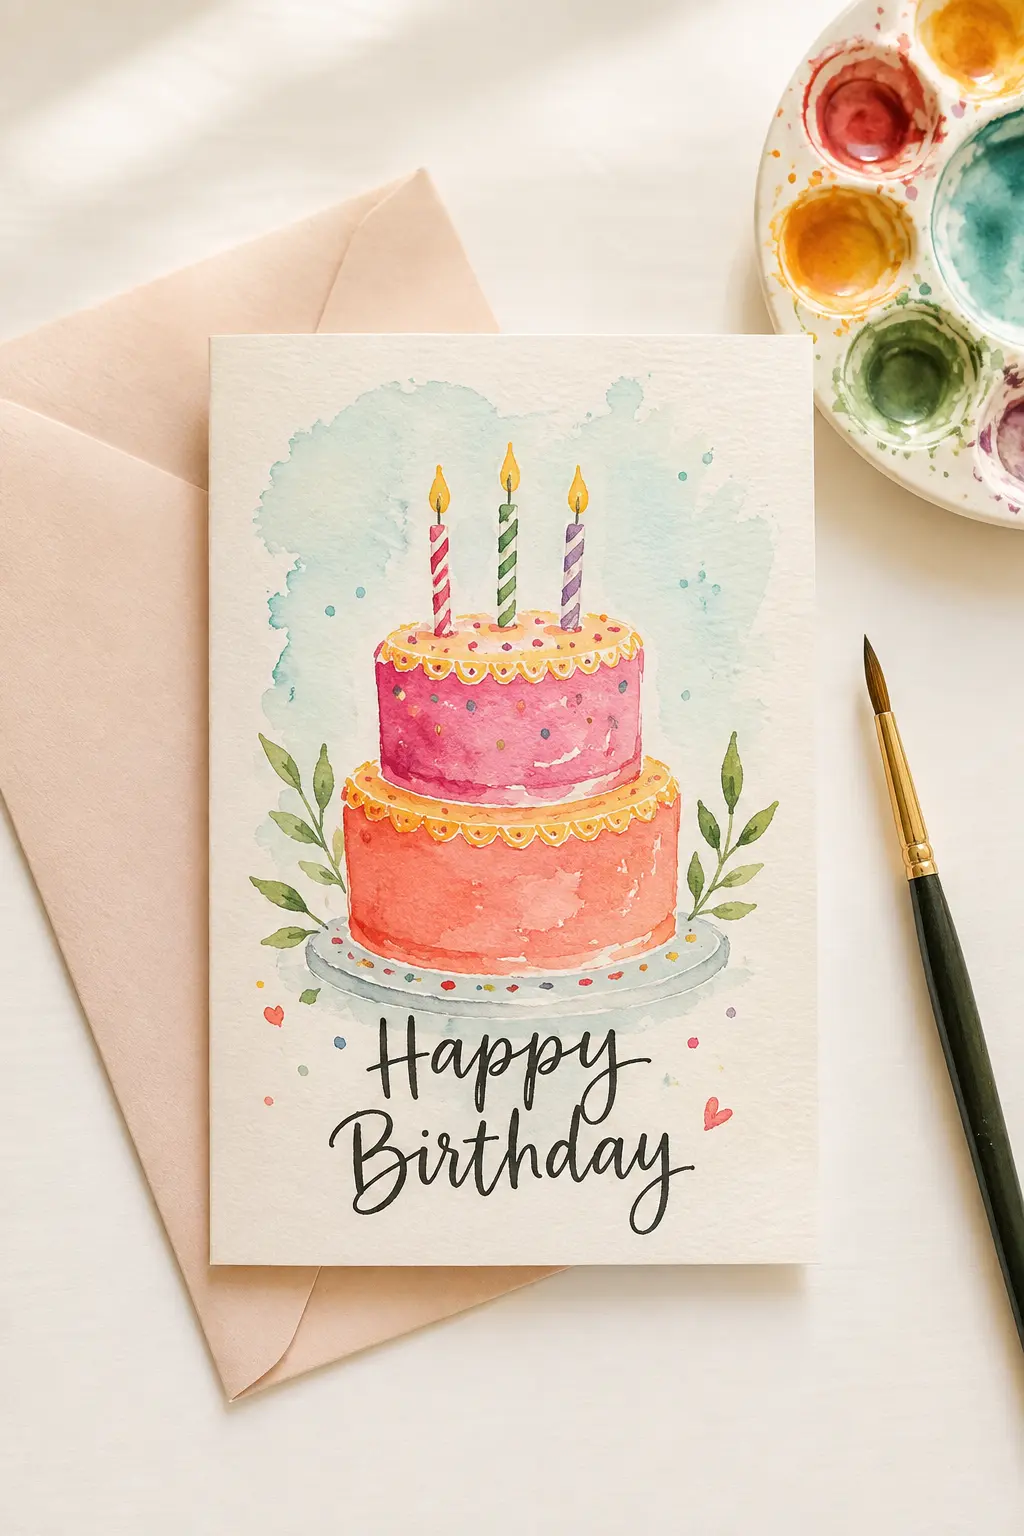
A hand-painted birthday card is the smallest possible piece of original art — and somehow the one people keep on the fridge for years. This is exactly how I paint mine in the studio, from the first pencil line to the sealed envelope. If you can hold a brush and make a wobbly circle, you can make this card.
Prefer to skip the paintbrush? I also sell hand-painted birthday and greeting cards — every one is an original miniature painting.
What You'll Need
Keep the supply list short. A beginner watercolor birthday card needs surprisingly little, and a simpler palette almost always looks more expensive.
- Cold-press watercolor paper, 140 lb / 300 gsm — or pre-folded blank watercolor cards
- A small watercolor set — pan or tube, 12 colors is plenty
- Two round brushes — a size 6 for washes, a size 2 for details
- Two jars of water — one to rinse, one kept clean
- Paper towel for lifting colour and testing the brush load
- HB pencil and a kneaded eraser for the sketch
- Washi tape and a board to keep the paper flat
- An envelope — a blush or kraft one makes the whole thing feel like a gift
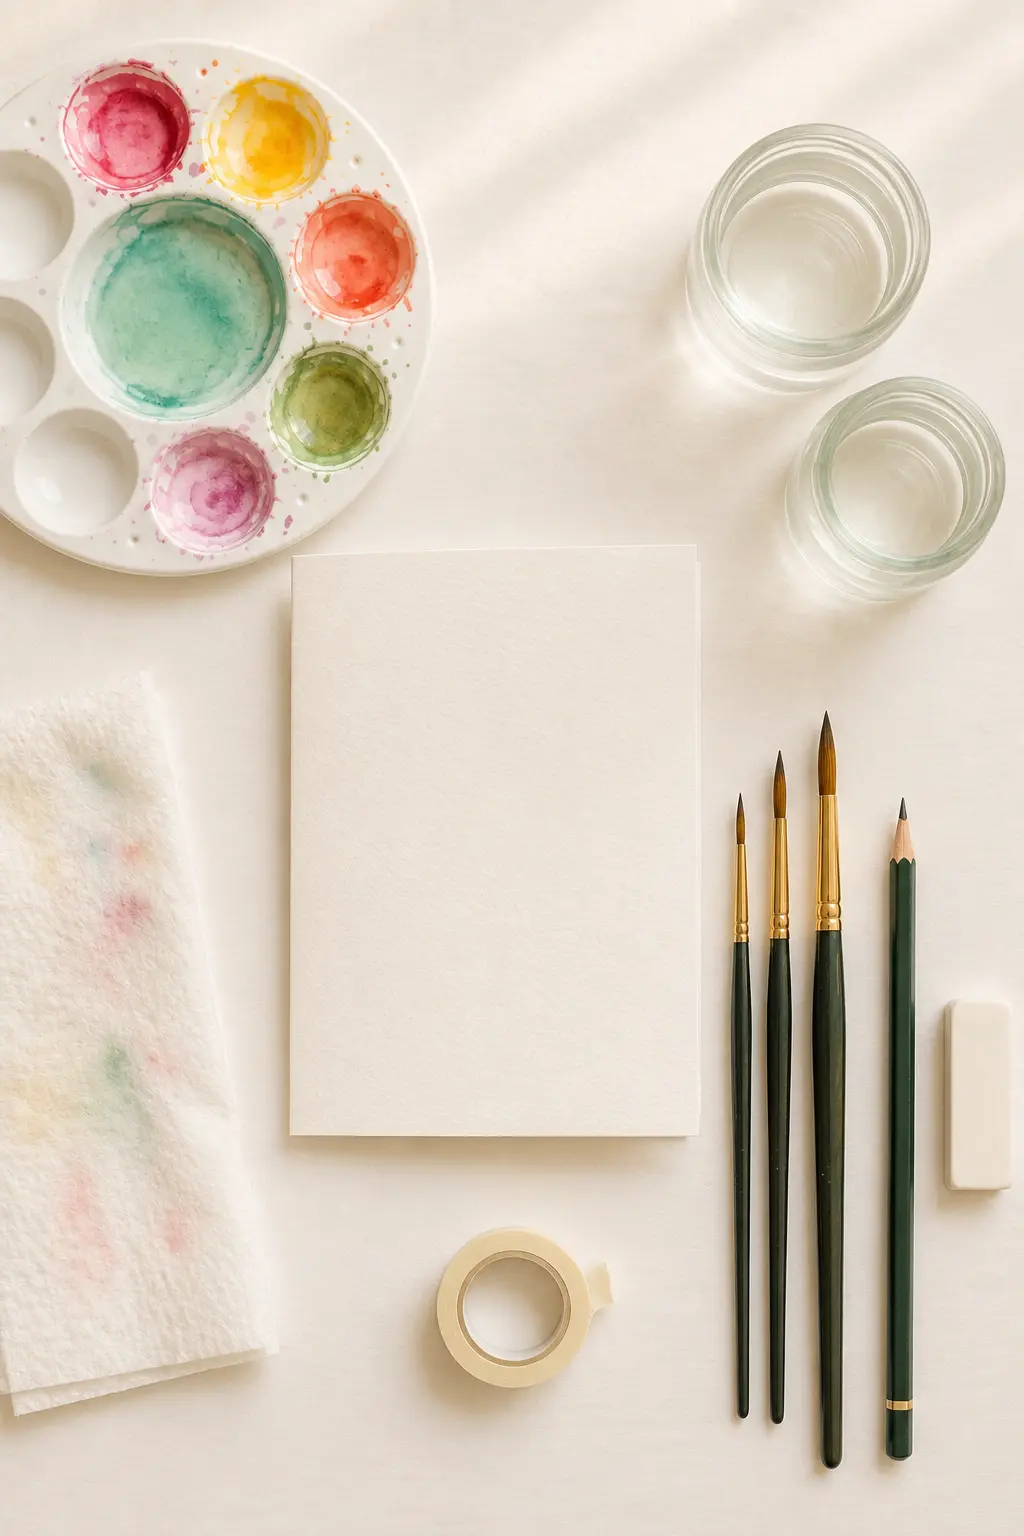
Step 1: Set Up a Calm Little Station
Tape your card to a board on all four sides so it can't buckle when it gets wet. Put your rinse jar on your dominant side, the clean jar behind it, and a folded paper towel between them. Mix a small puddle of each colour you plan to use before you start — watercolour dries fast, and hunting for a colour mid-wash is how blooms go wrong.
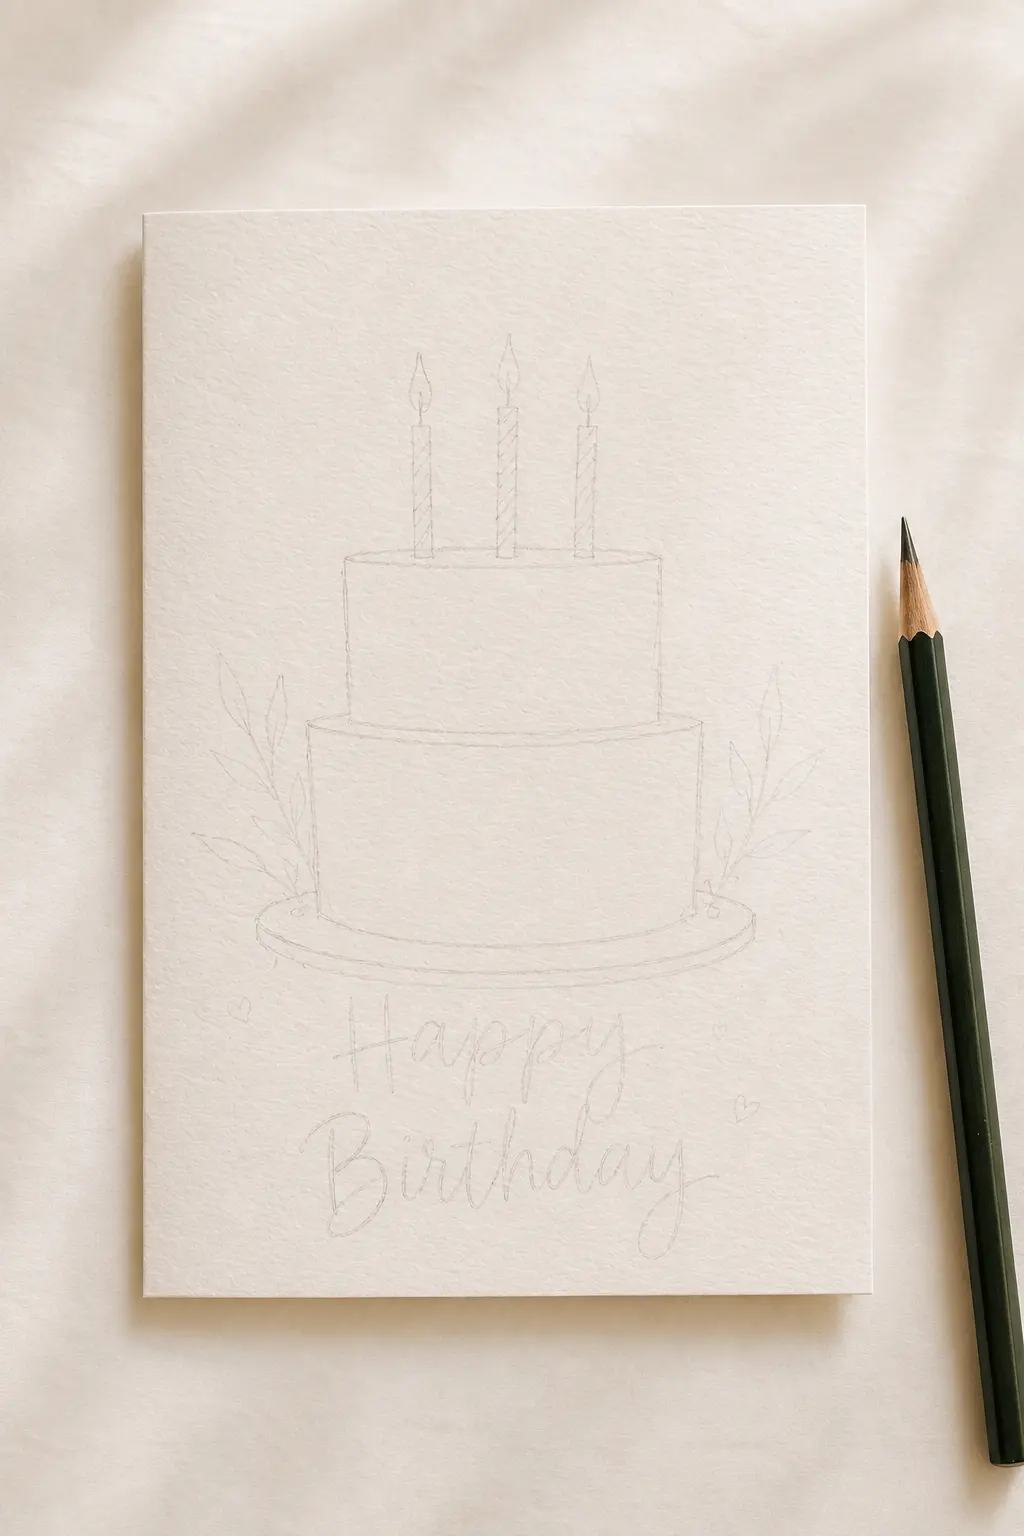
Step 2: Sketch Lightly in Pencil
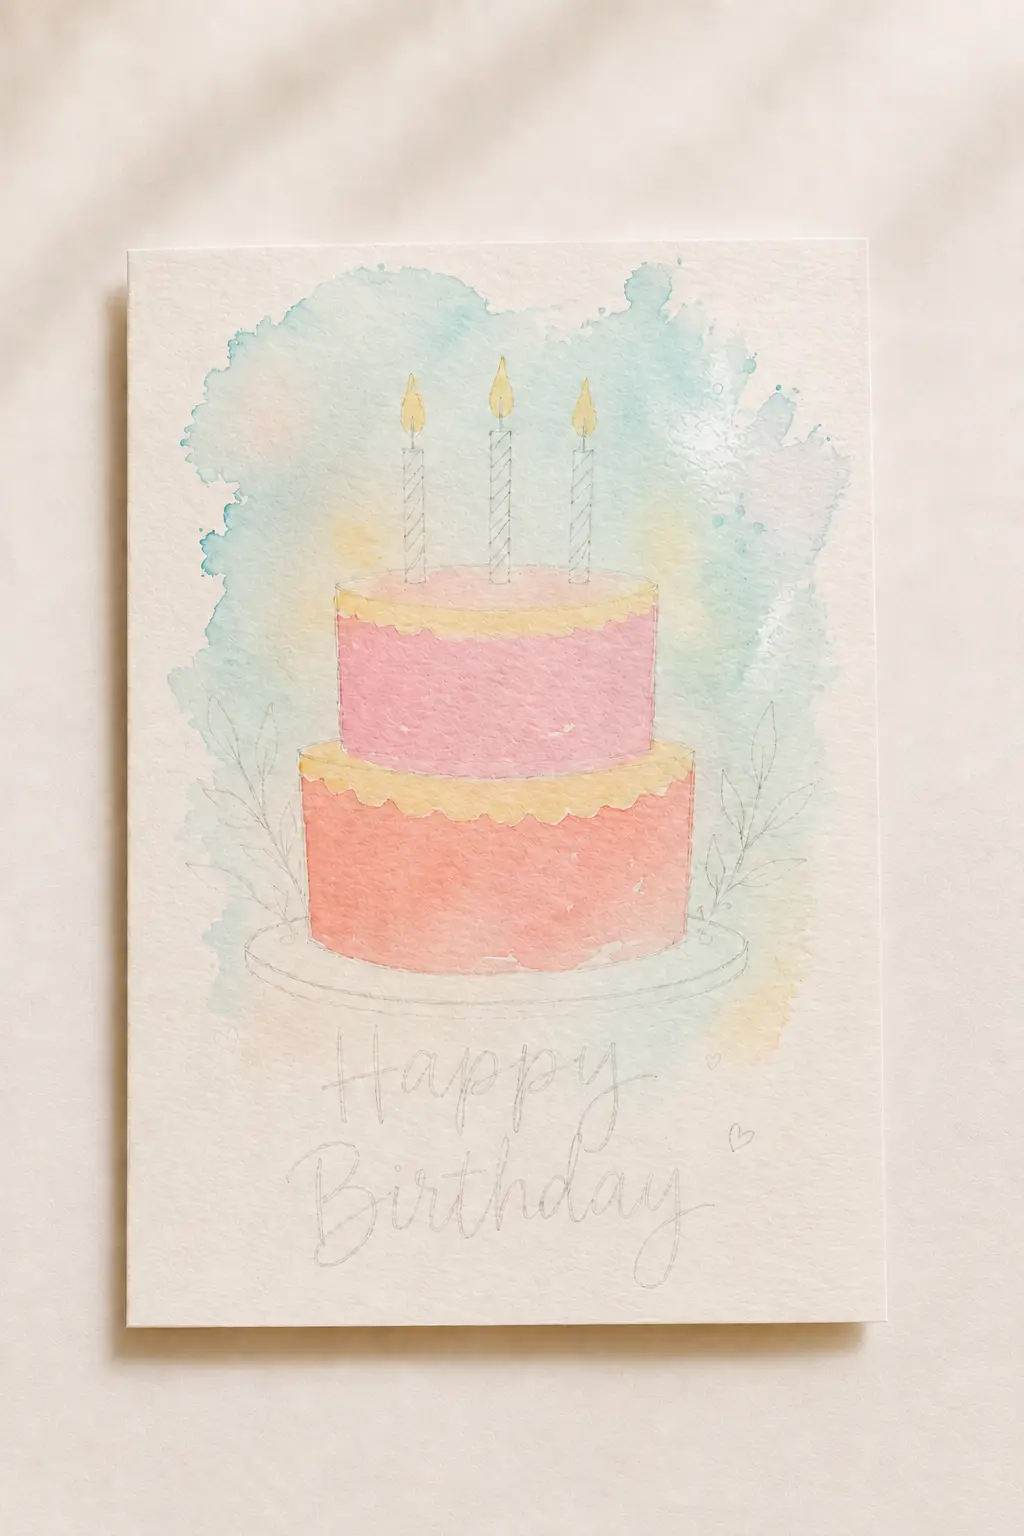
Draw a two-tier cake in the upper two thirds of the card: an oval for the top of each tier, straight sides, a shallow plate underneath. Add three candles with little teardrop flames, a leafy sprig on each side, and pencil in where Happy Birthday will sit so you don't run out of room later.
Press feather-light. Graphite that's too dark will show through even the deepest pink, and it won't erase once paint has sealed it in.
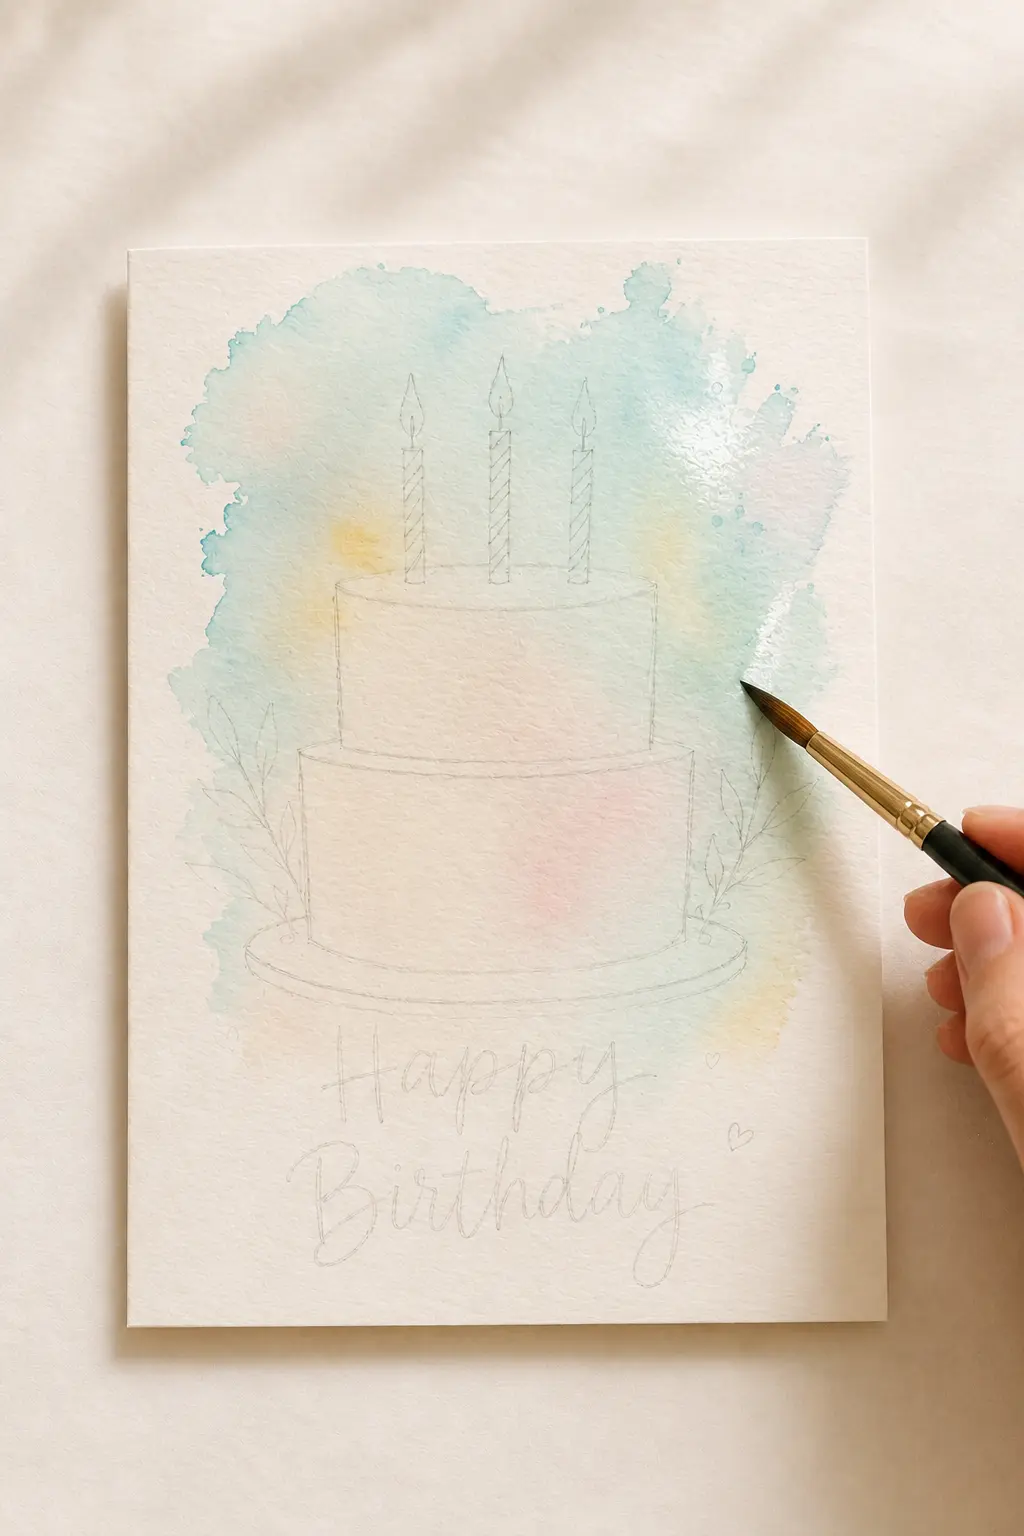
Step 3: Paint a Wet-on-Wet Background Wash
With the size 6 brush, paint clean water in a loose cloud shape behind the cake — irregular edges look more painterly than a neat rectangle. While the paper is still shiny, touch in diluted turquoise at the top and a whisper of peach at the sides. Let the colours drift into each other on their own; every push of the brush makes it flatter.
Then walk away. The wash has to be completely dry before the cake goes on, or the two layers will bleed together.
Step 4: Lay the First Cake Layer
Fill the top tier with a soft pink and the bottom tier with a warm coral, staying just inside your pencil lines. Leave one or two tiny gaps of white paper on each tier — those unpainted slivers read as shine and keep the cake from looking like a flat sticker.
Let the top tier dry before painting the bottom one. Two wet shapes that touch will run together instantly.
Step 5: Candles, Frosting and Greenery
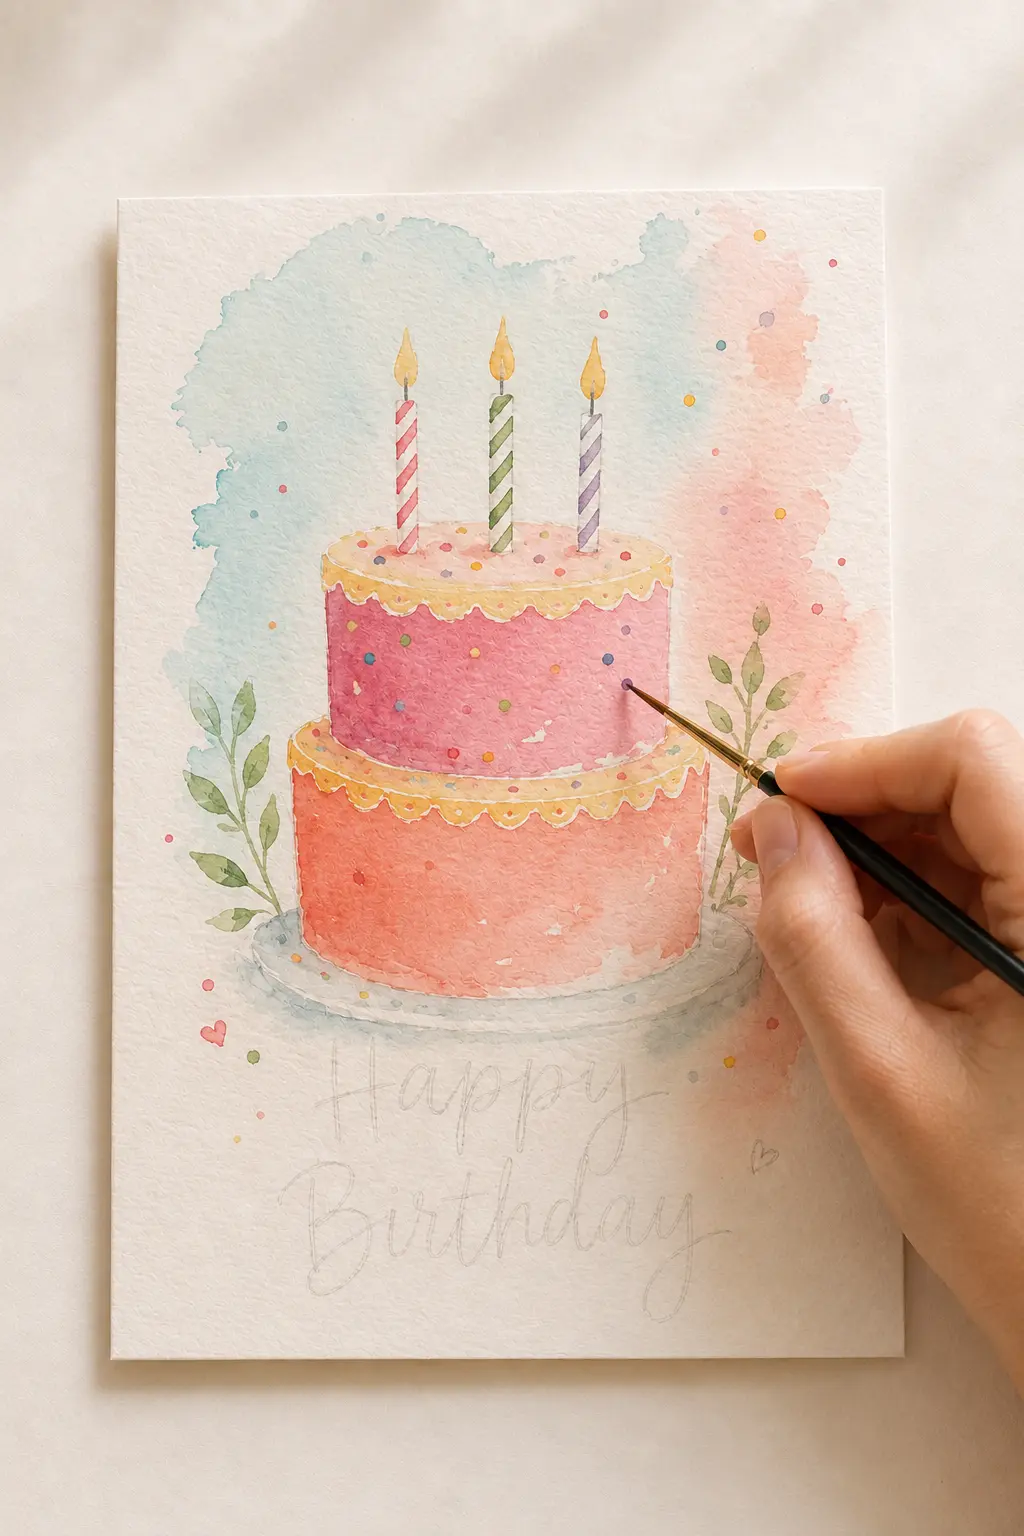
Stripe each candle in a different colour — pink, green, lilac — with the size 2 brush, then dot a warm yellow flame above each wick with a hairline of orange at the base. Paint a buttery yellow band of frosting along the top edge of each tier, and add sage-green sprigs on both sides of the cake stand to frame the whole thing.
Not a cake person? The same steps work with a single stem — a peony, a poppy, a sprig of bougainvillea. Botanicals are the easiest motif to improvise, and they're the heart of my Florals & Botanicals collection.
Step 6: Add the Small Details
This is the step that makes a handmade card look finished. With the fine brush, add a scalloped edge under each frosting band, scatter confetti dots in five or six colours across the cake and the background, and glaze a slightly deeper shadow under each tier and along one side of the plate.
Work in small marks and stop while you still like it. Overworked watercolour loses its glow.
Step 7: Hand-Letter the Greeting
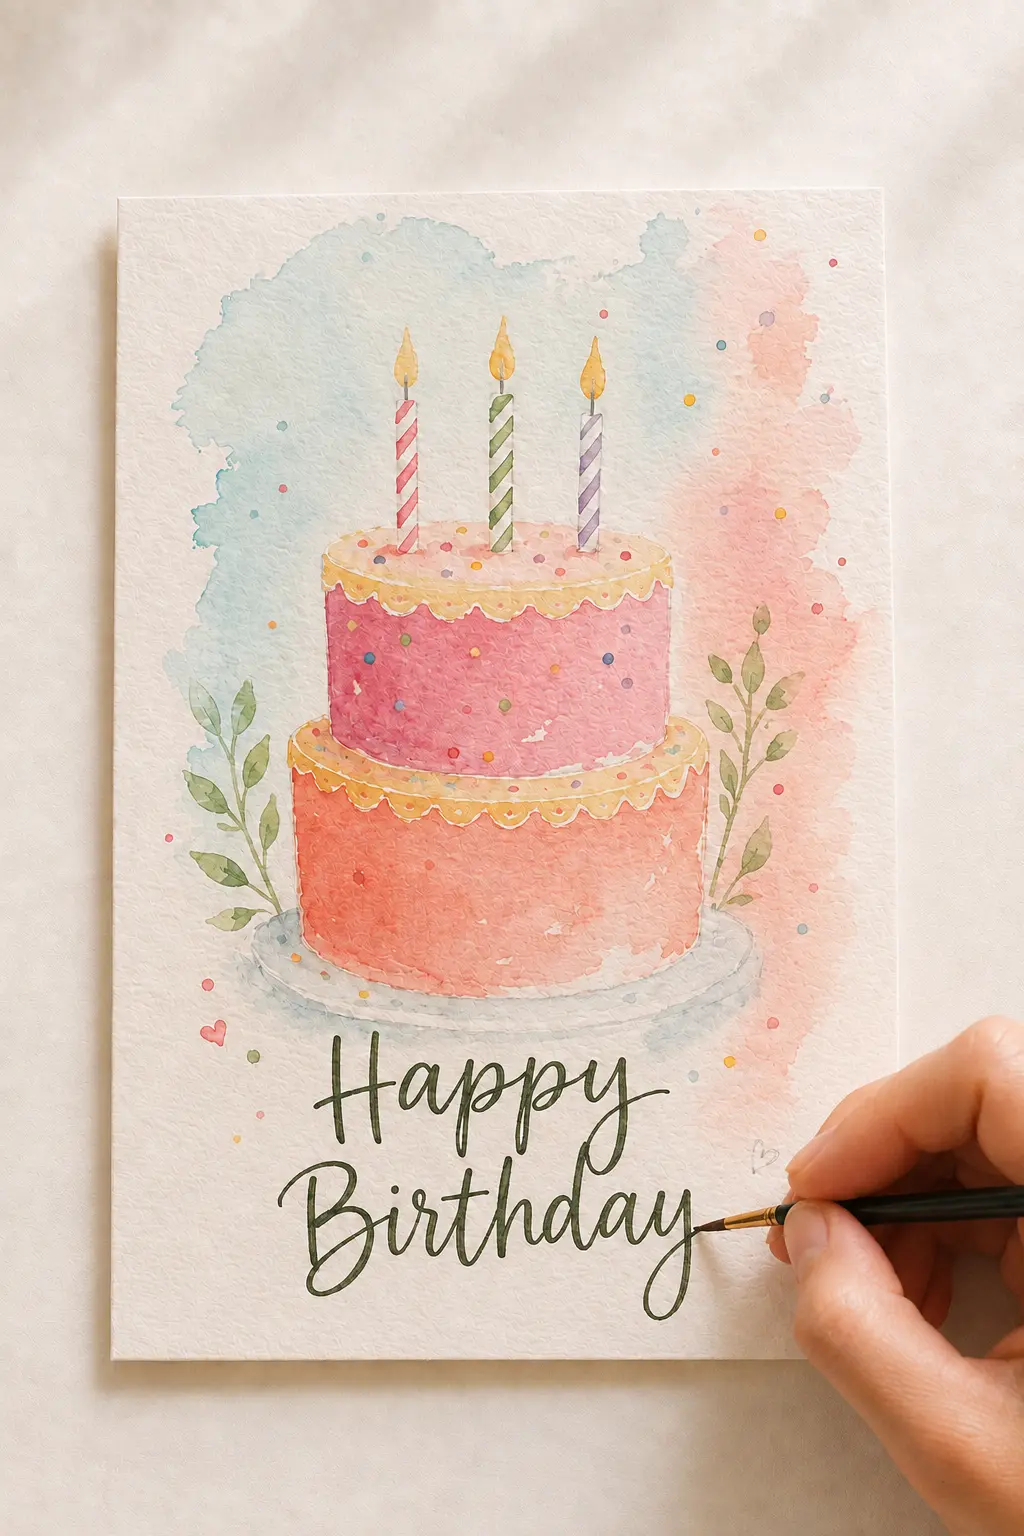
Wait until the paint is bone dry, then letter Happy Birthday in a deep charcoal-green with the size 2 brush or a fine-liner. The faux-calligraphy rule is the only one you need: thin lines going up, thick lines coming down. Write it twice on scrap paper first so your hand knows the rhythm.
Finish with two tiny hearts in the empty corners to balance the composition.
Finishing and Mailing Your Card
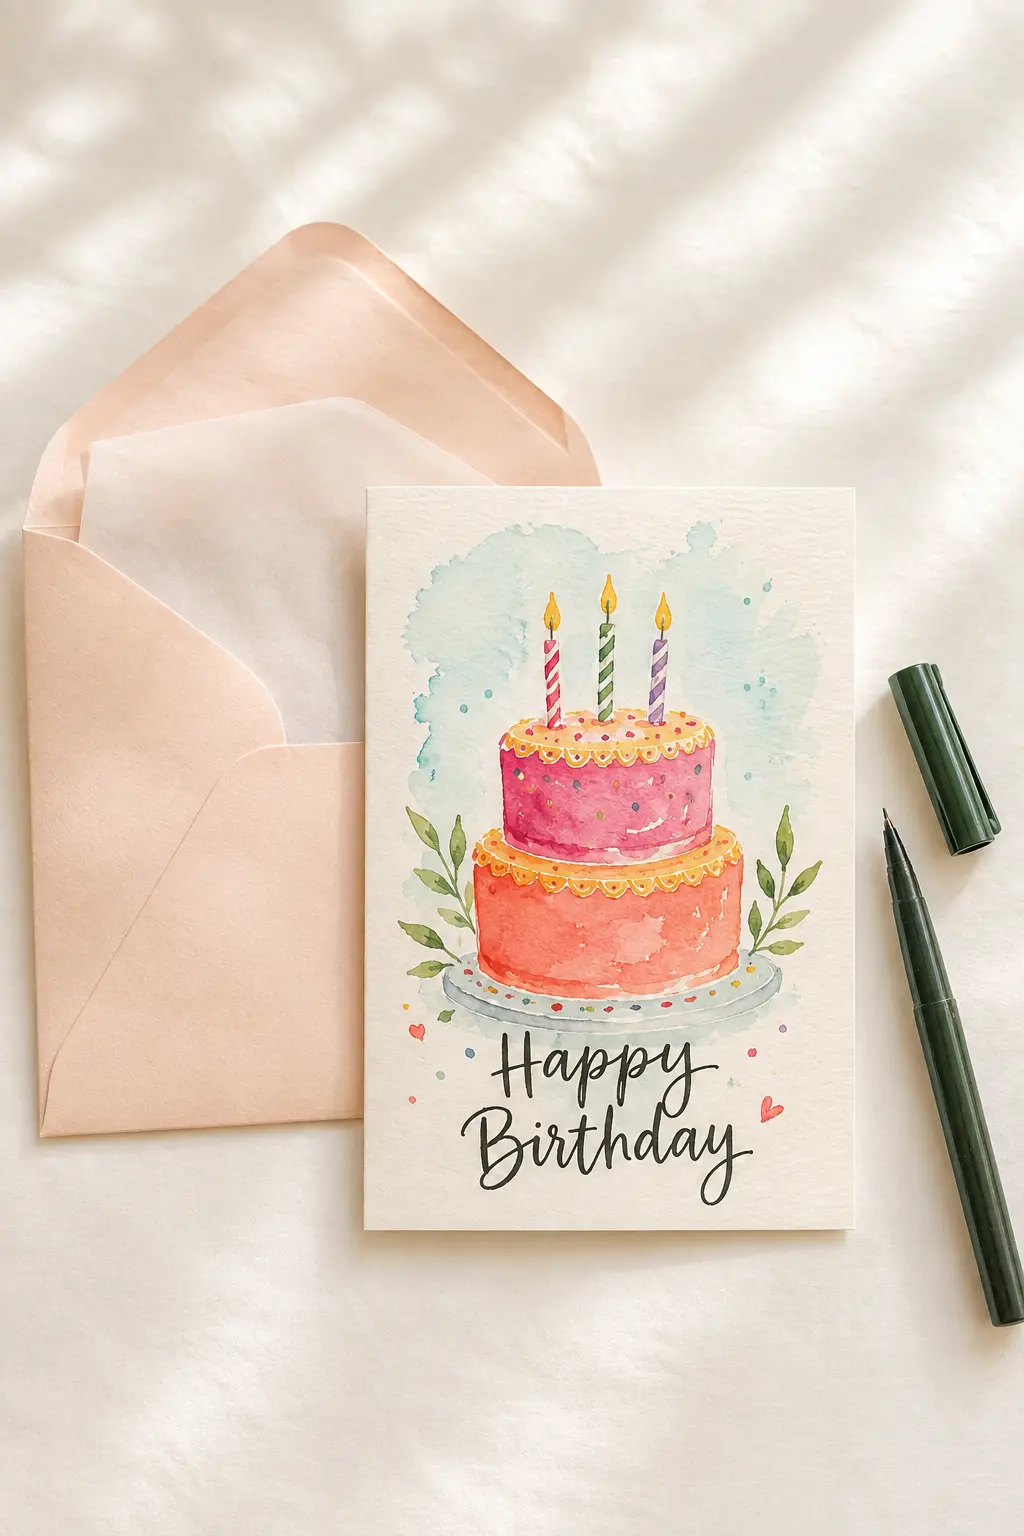
Erase any stray pencil with a kneaded eraser using a gentle rolling motion. Peel the tape off slowly, pulling away from the paper at a low angle. If the card cupped at all while it dried, press it overnight under a stack of heavy books between two clean sheets of paper.
- Sign and date the back — it's a tiny original painting, treat it like one.
- Write your note in a pigment ink pen so it won't smudge if the card gets damp.
- Slip it into a blush or kraft envelope with a sheet of tissue behind it.
- Add a rigid mailer or extra card stock if you're posting it far — and hand-cancel at the counter so it isn't run through the machines.
Beginner Tips Worth Remembering
- Less water than you think for details, more than you think for washes.
- Dry between layers. Almost every muddy card is two wet layers that met too soon.
- Keep the white paper. Unpainted gaps are your only highlights in watercolour.
- Paint three cards at once. They dry in rotation and the third is always the best one.
- Sign the back. Future-you will love finding the date.
Frequently Asked Questions
What paper is best for watercolor birthday cards?
Cold-press watercolor paper at 140 lb (300 gsm) or heavier. Lighter paper buckles and pills as soon as you add a wash. Pre-folded blank watercolor cards are the easiest option because they're already scored and sized to standard A2 envelopes.
Do I need expensive paints to start?
No. A basic 12-pan student set is plenty for cards — the paper matters far more than the paint. Upgrade your paper first, then buy one or two artist-grade colours you reach for constantly.
How do I stop my watercolor card from warping?
Tape all four edges to a board before you start, use less water in your washes, and press the finished card overnight under heavy books between clean sheets of paper.
How long does a watercolor birthday card take to make?
About 45 minutes of painting spread over an hour and a half, since you need drying time between layers. Painting three or four cards in rotation makes that waiting time disappear.
Can I hand-letter if my handwriting is messy?
Yes. Faux calligraphy — thin upstrokes, thickened downstrokes — turns ordinary handwriting into lettering. Sketch the words in pencil first, then trace over them with the brush.
Can I sell cards made from this tutorial?
Paint them for friends, family and yourself as much as you like. Please don't reproduce or resell my original designs — but the techniques here are yours to use in your own artwork.